Web developers in the modern era often create different kinds of Web APIs and publish them to some platforms. In recent years probably some Cloud platforms. These APIs are then consumed by some SPA applications (React, Angular, or similar SPA applications), mobile, or desktop applications. However, security best practices must be applied and this is something a lot of developers struggle with. In the Azure platform, we have some powerful features in place to ensure we can develop securely end-to-end. One example is the Microsoft Identity Web provider. The main advantage of using this provider is that we don’t need to know protocols such as OpenID Connect or OAuth and this enables us to not be involved manually in all changes of these protocols that happen all the time.
Microsoft Identity platform
Microsoft Identity Web is a library that contains a set of reusable classes used in conjunction with ASP.NET Core for integrating with the Microsoft identity platform (formerly Azure AD v2.0 endpoint) and AAD B2C. It can be also used with desktop and mobile applications.
The Microsoft Identity platform supports authentication for different kinds of modern application architectures. All of the architectures are based on the industry-standard protocols OAuth and OpenID Connect. By using the authentication libraries for the Microsoft identity platform, applications authenticate identities and acquire tokens to access protected APIs.
Protecting Web APIs in this case is done by calling an API through an access token. The token helps secure the APIs data and authenticate incoming requests. The caller of a web API appends an access token in the authorization header of an HTTP request.
Prerequisites
To start with using the Microsoft Identity platform to protect Web APIs, you need to have:
- An Azure account with an active subscription. Create an account for free.
- An Azure AD tenant.
- An ASP.NET Core Web API application. In this example, we will use the default Web API application crated from Microsoft Visual Studio 2019.
Creating a simple Web API
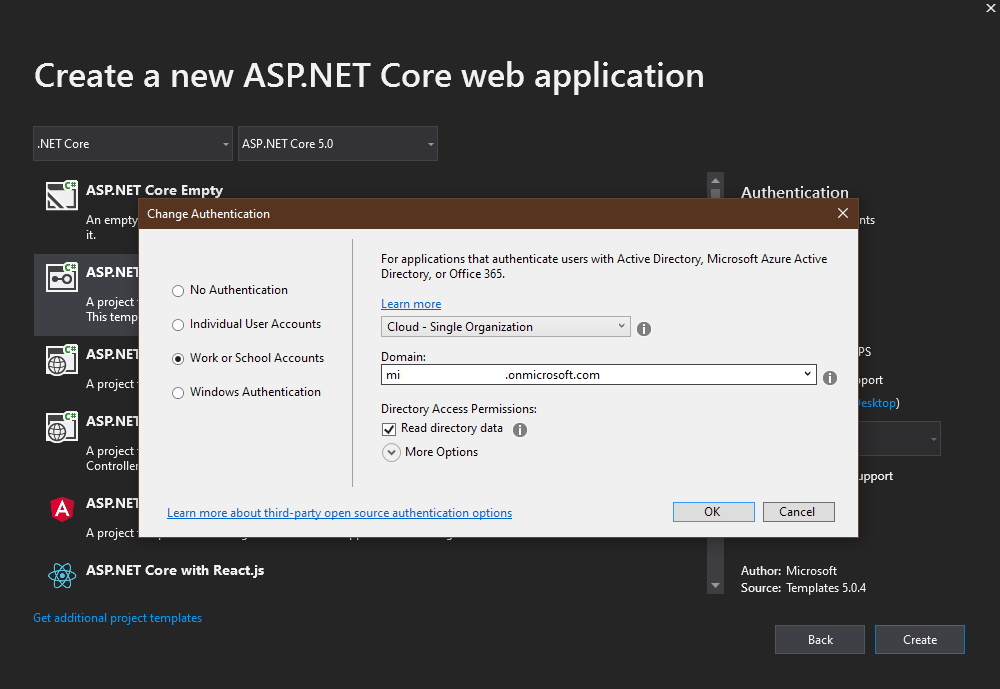
If we create a new app, it is important to select the proper Authentication type - Work or School Accounts, that will be authenticated with Microsoft Azure Active Directory (AD).
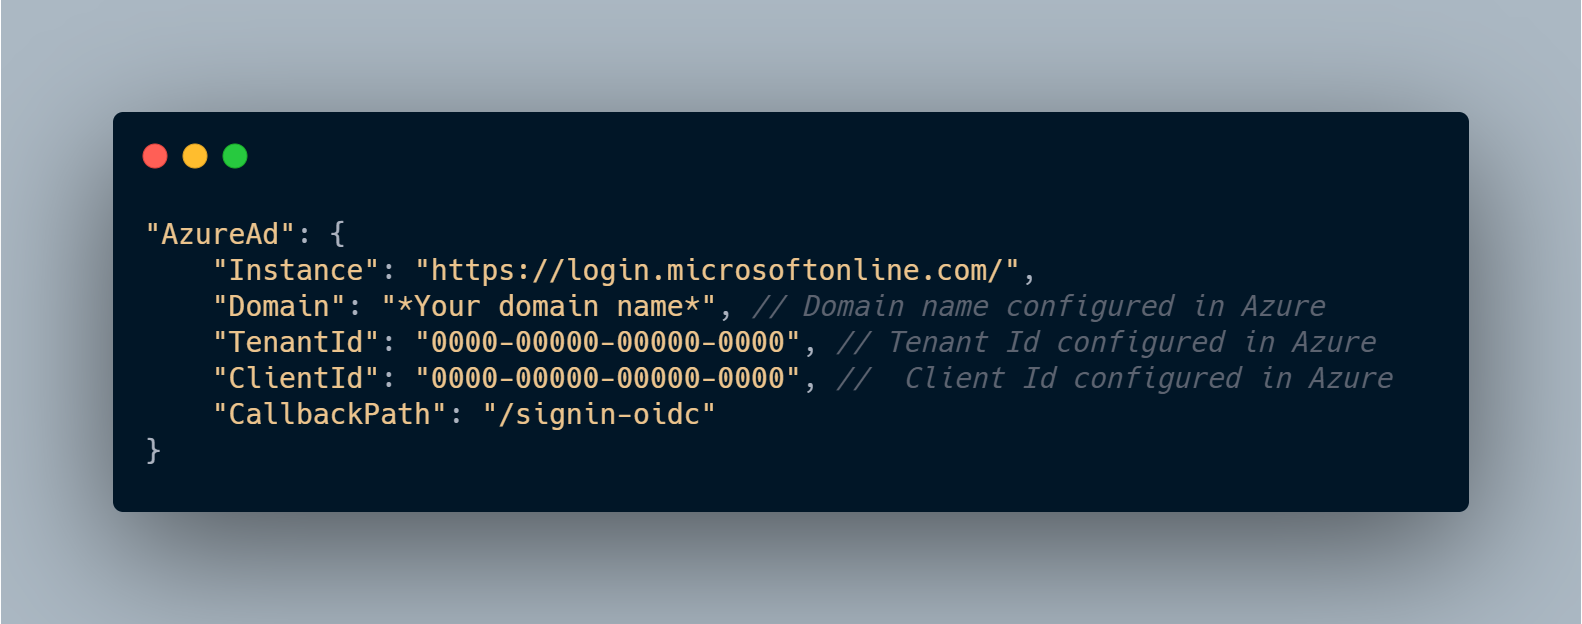
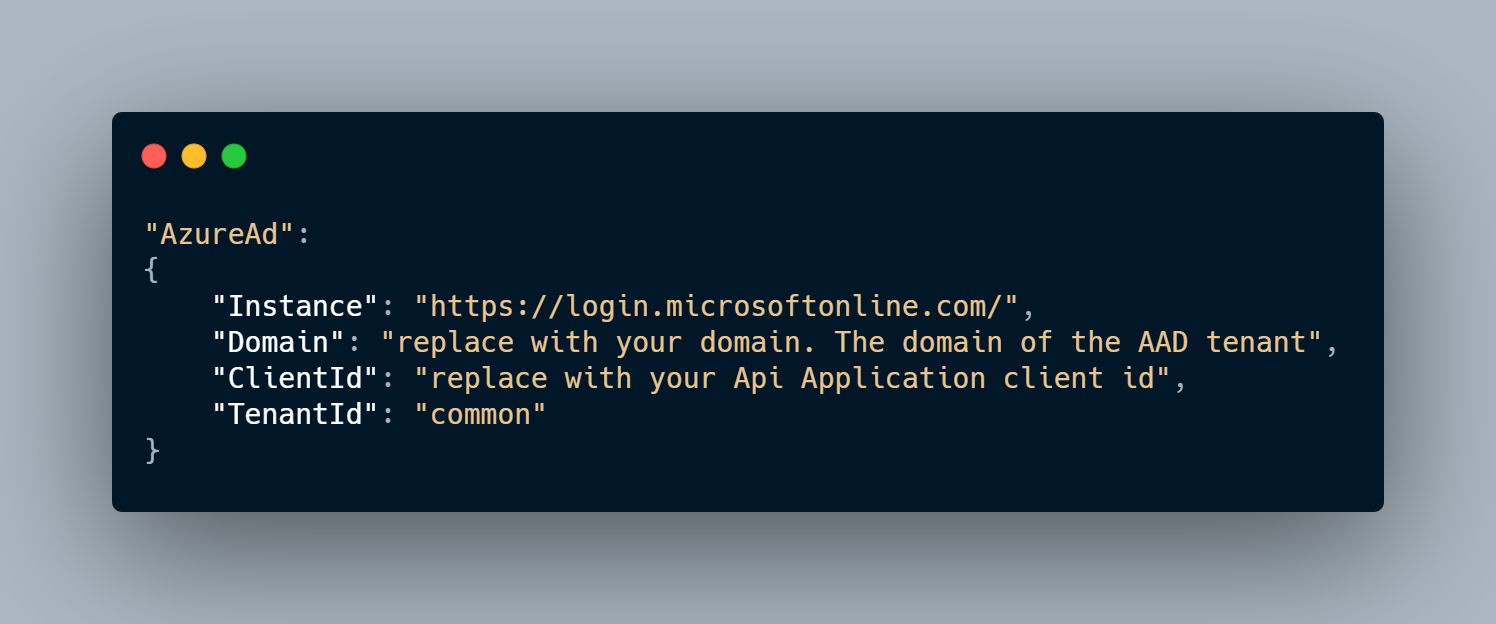
In appsettings.json there will be a defined AzureAd field with all important properties to connect to the Azure AD, such as Instance, Domain, Tenant ID, and Client ID.
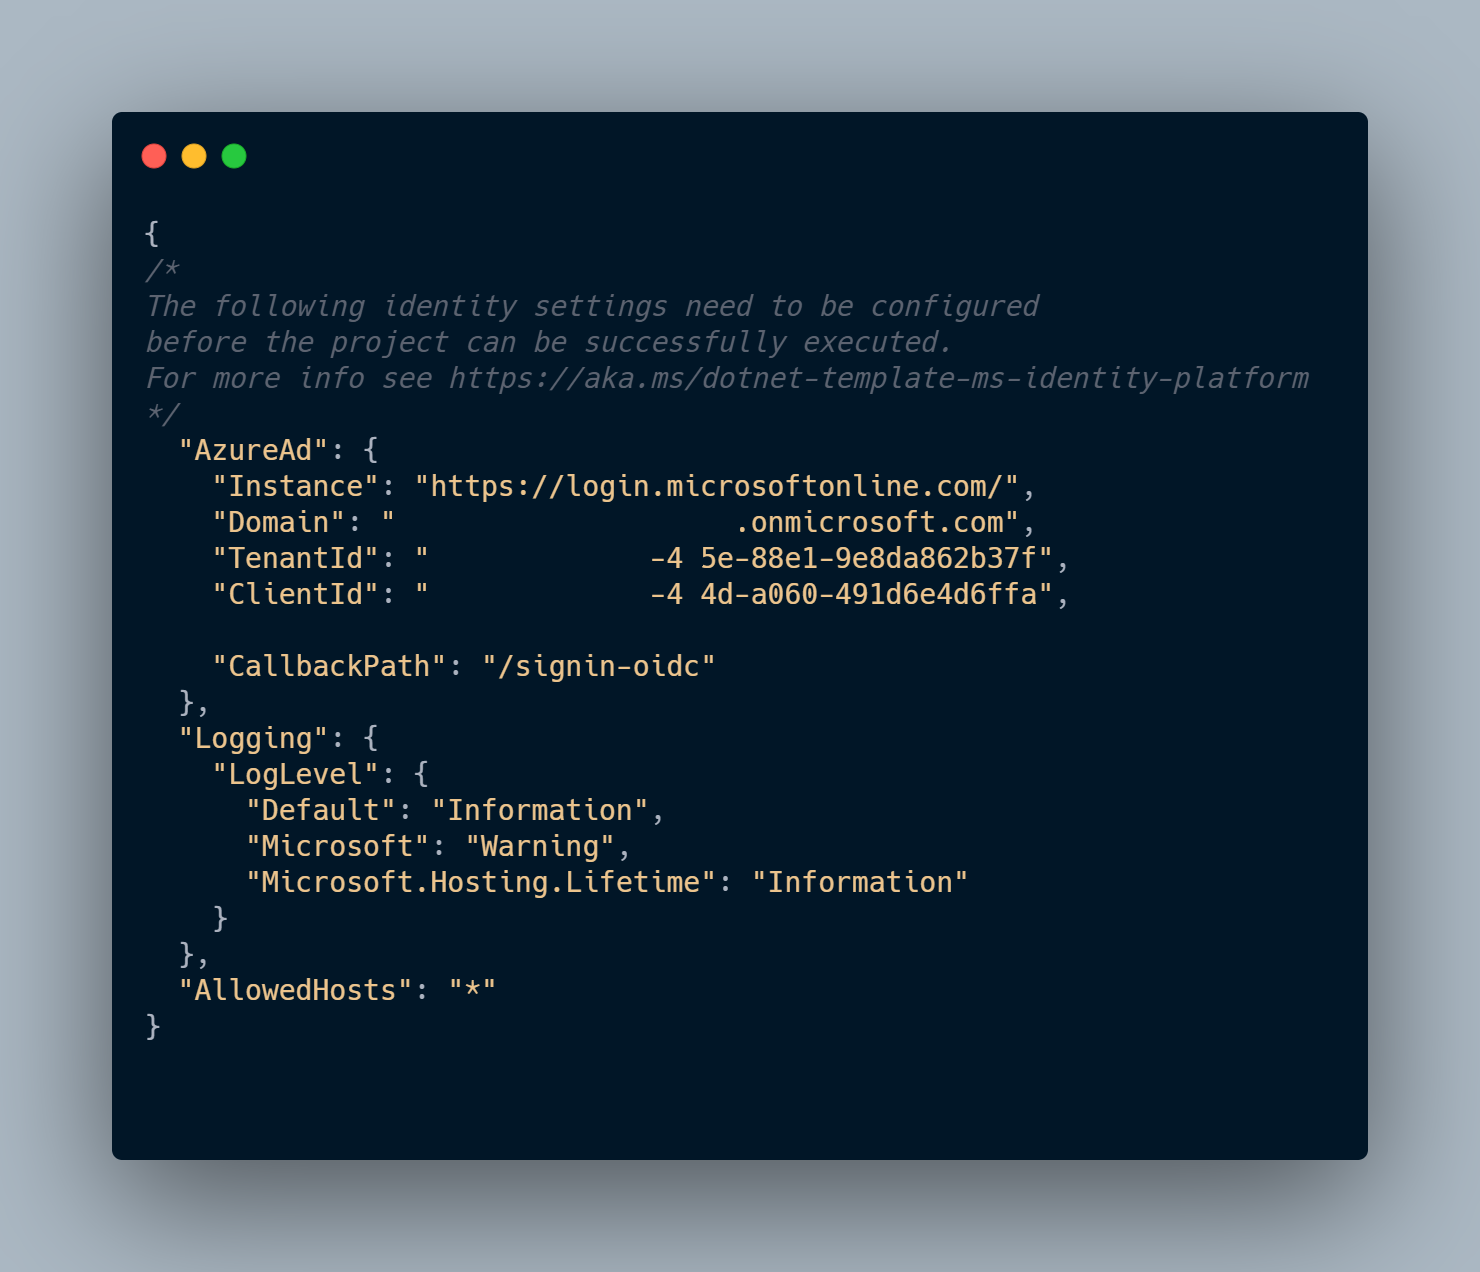
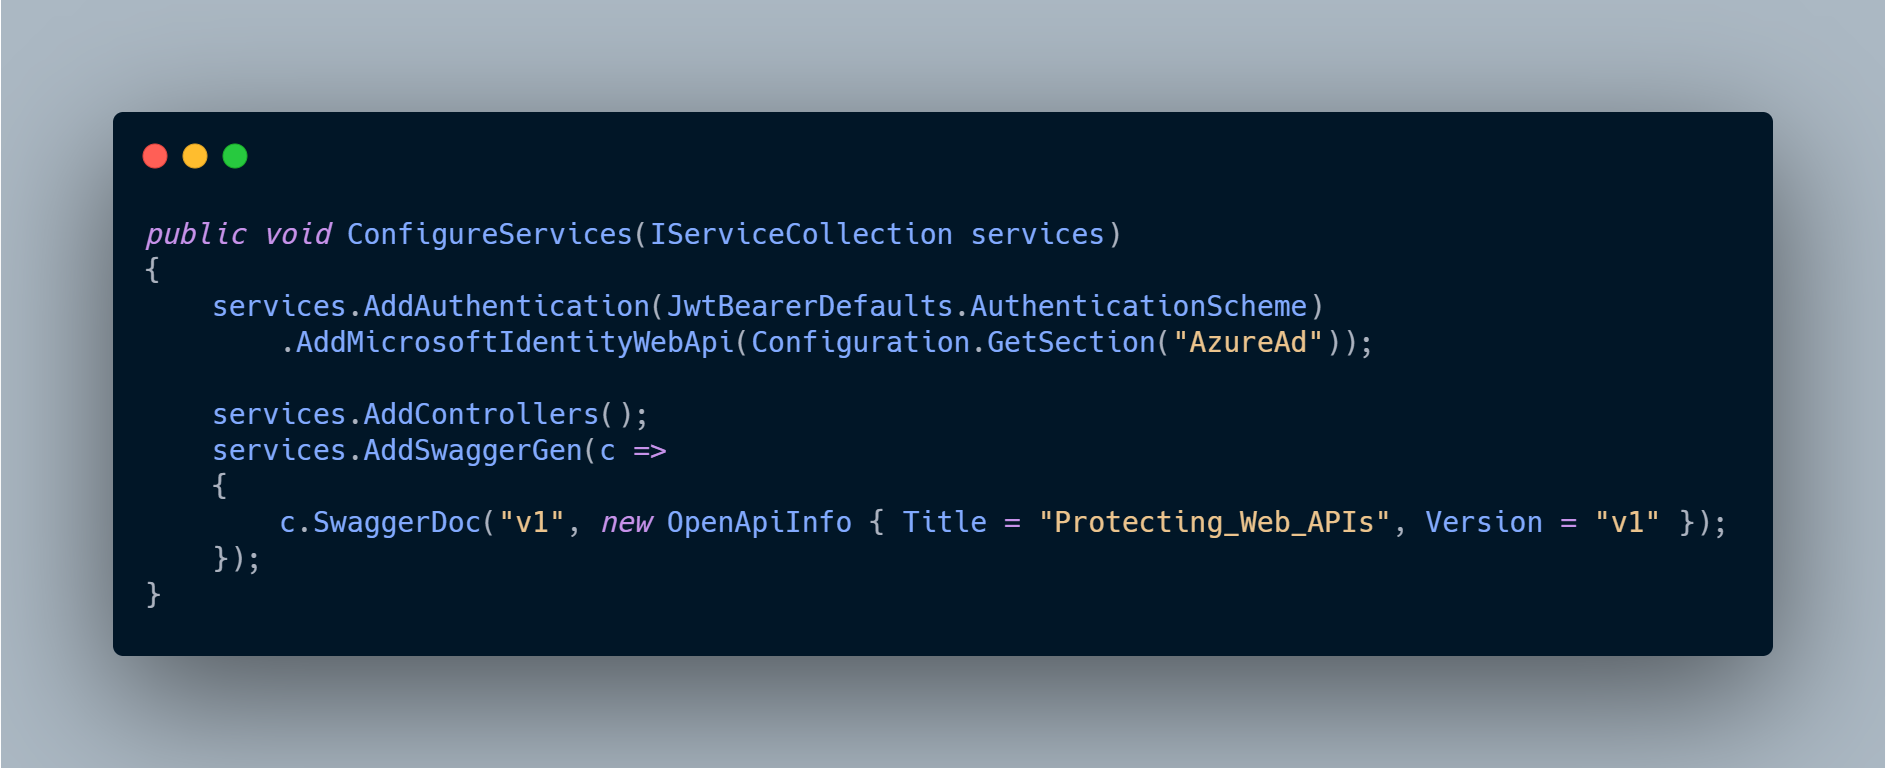
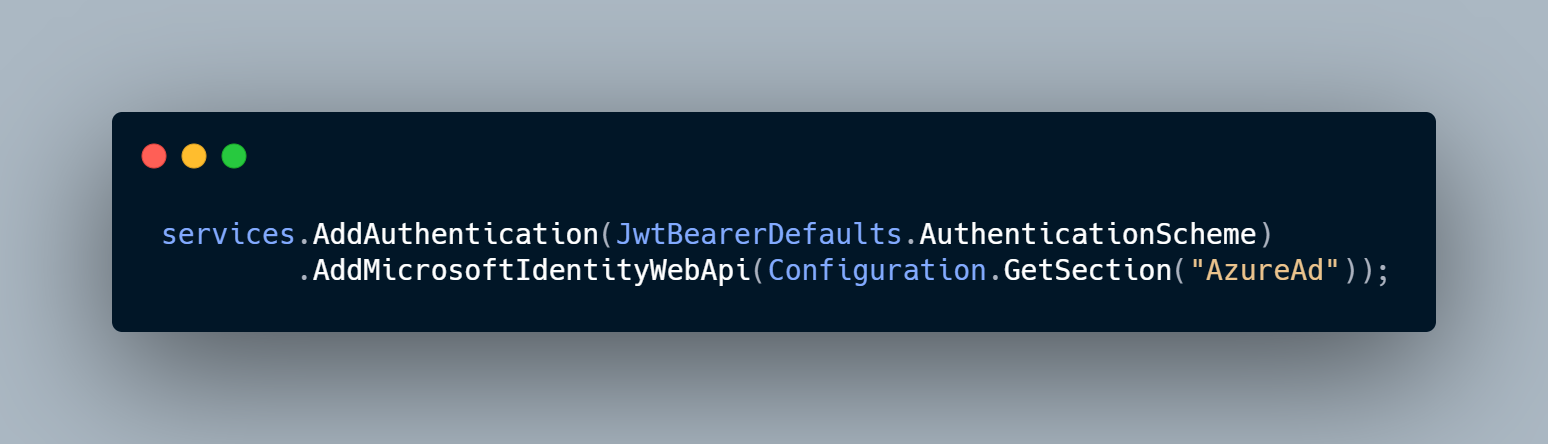
This section from appsettings.json will then be used in Startup.cs to define Microsoft Identity Web Api as an authentication type.
Register the API Application with Azure AAD
When we have created and configured the application the next step is to register the application within the (Azure) portal. Here we need to register one application (the API) we are protecting and another one will be created for each client we want to consume this API from. An example of such a client could be Web application (SPA), mobile application, etc. In the following example, we will use Postman.
Register the API Application
To authenticate against Azure AD we need to add Azure AD application registrations and this can be done through the Azure portal:
http://portal.azure.com > Azure Active Directory > App registrations > New registration.

Enter a name, here one can choose the name of the application and ‘Api’. Example: Protected API app.
Choose who can access your application. Here I am choosing the option that allows anyone that has an Azure AD Account or consumer account access to the API. That is Accounts in any organizational directory (Any Azure AD directory - Multitenant) and personal Microsoft accounts (e.g. Skype, Xbox).
Click “Register”.
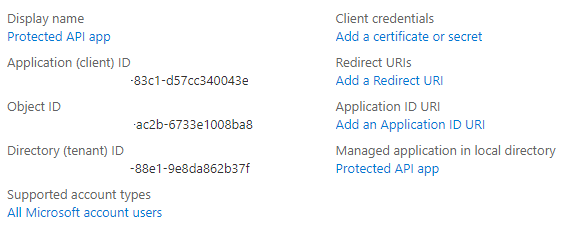
When the app registration is complete we can see the Client Id and Tenant Id in the Azure overview and copy those ID’d we will need in configuration setup.
Creating Scopes
The Scope is a mechanism in OAuth 2.0 to limit an application’s access to a user’s account. An application can request one or more scopes, this information is then presented to the user in the consent screen, and the access token issued to the application will be limited to the scopes granted.
Here we are going to create one scope and use it in our application.
In the Azure portal, go to the API application registration and click on “Expose an API”. Here we will see something like “Application ID URI”, click “Set”. You’ll something like api://e6ae15e8-3321-4035-83c1-6b38664404a5. This is used as the base of your scopes, the Guid is automatically generated.
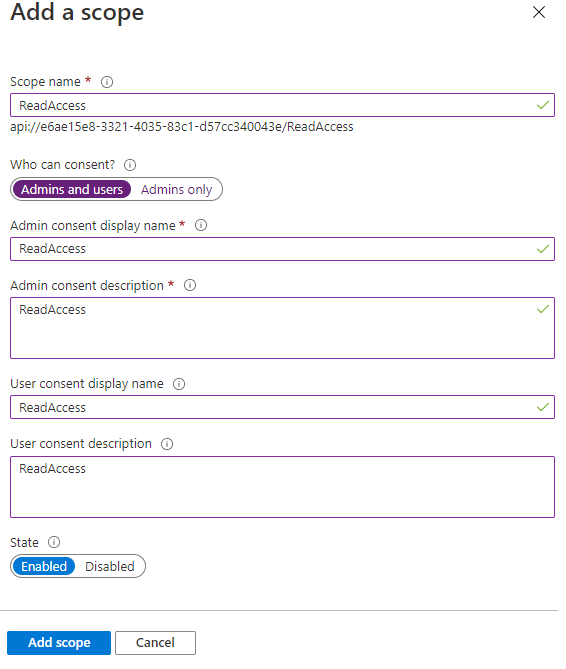
Here we will add one scope for every permission we want. We want only read permission so we will create just one scope.
Update the Web API Project to use Azure AD Authentication
We need to configure the Azure Active Directory setup in appsettings.json by adding the application (Client ID) and Tenant Id.
The Authentication type Microsoft.identity.platform helps in the integration of Azure AD and it will add all the basic configuration setup in the respective files.
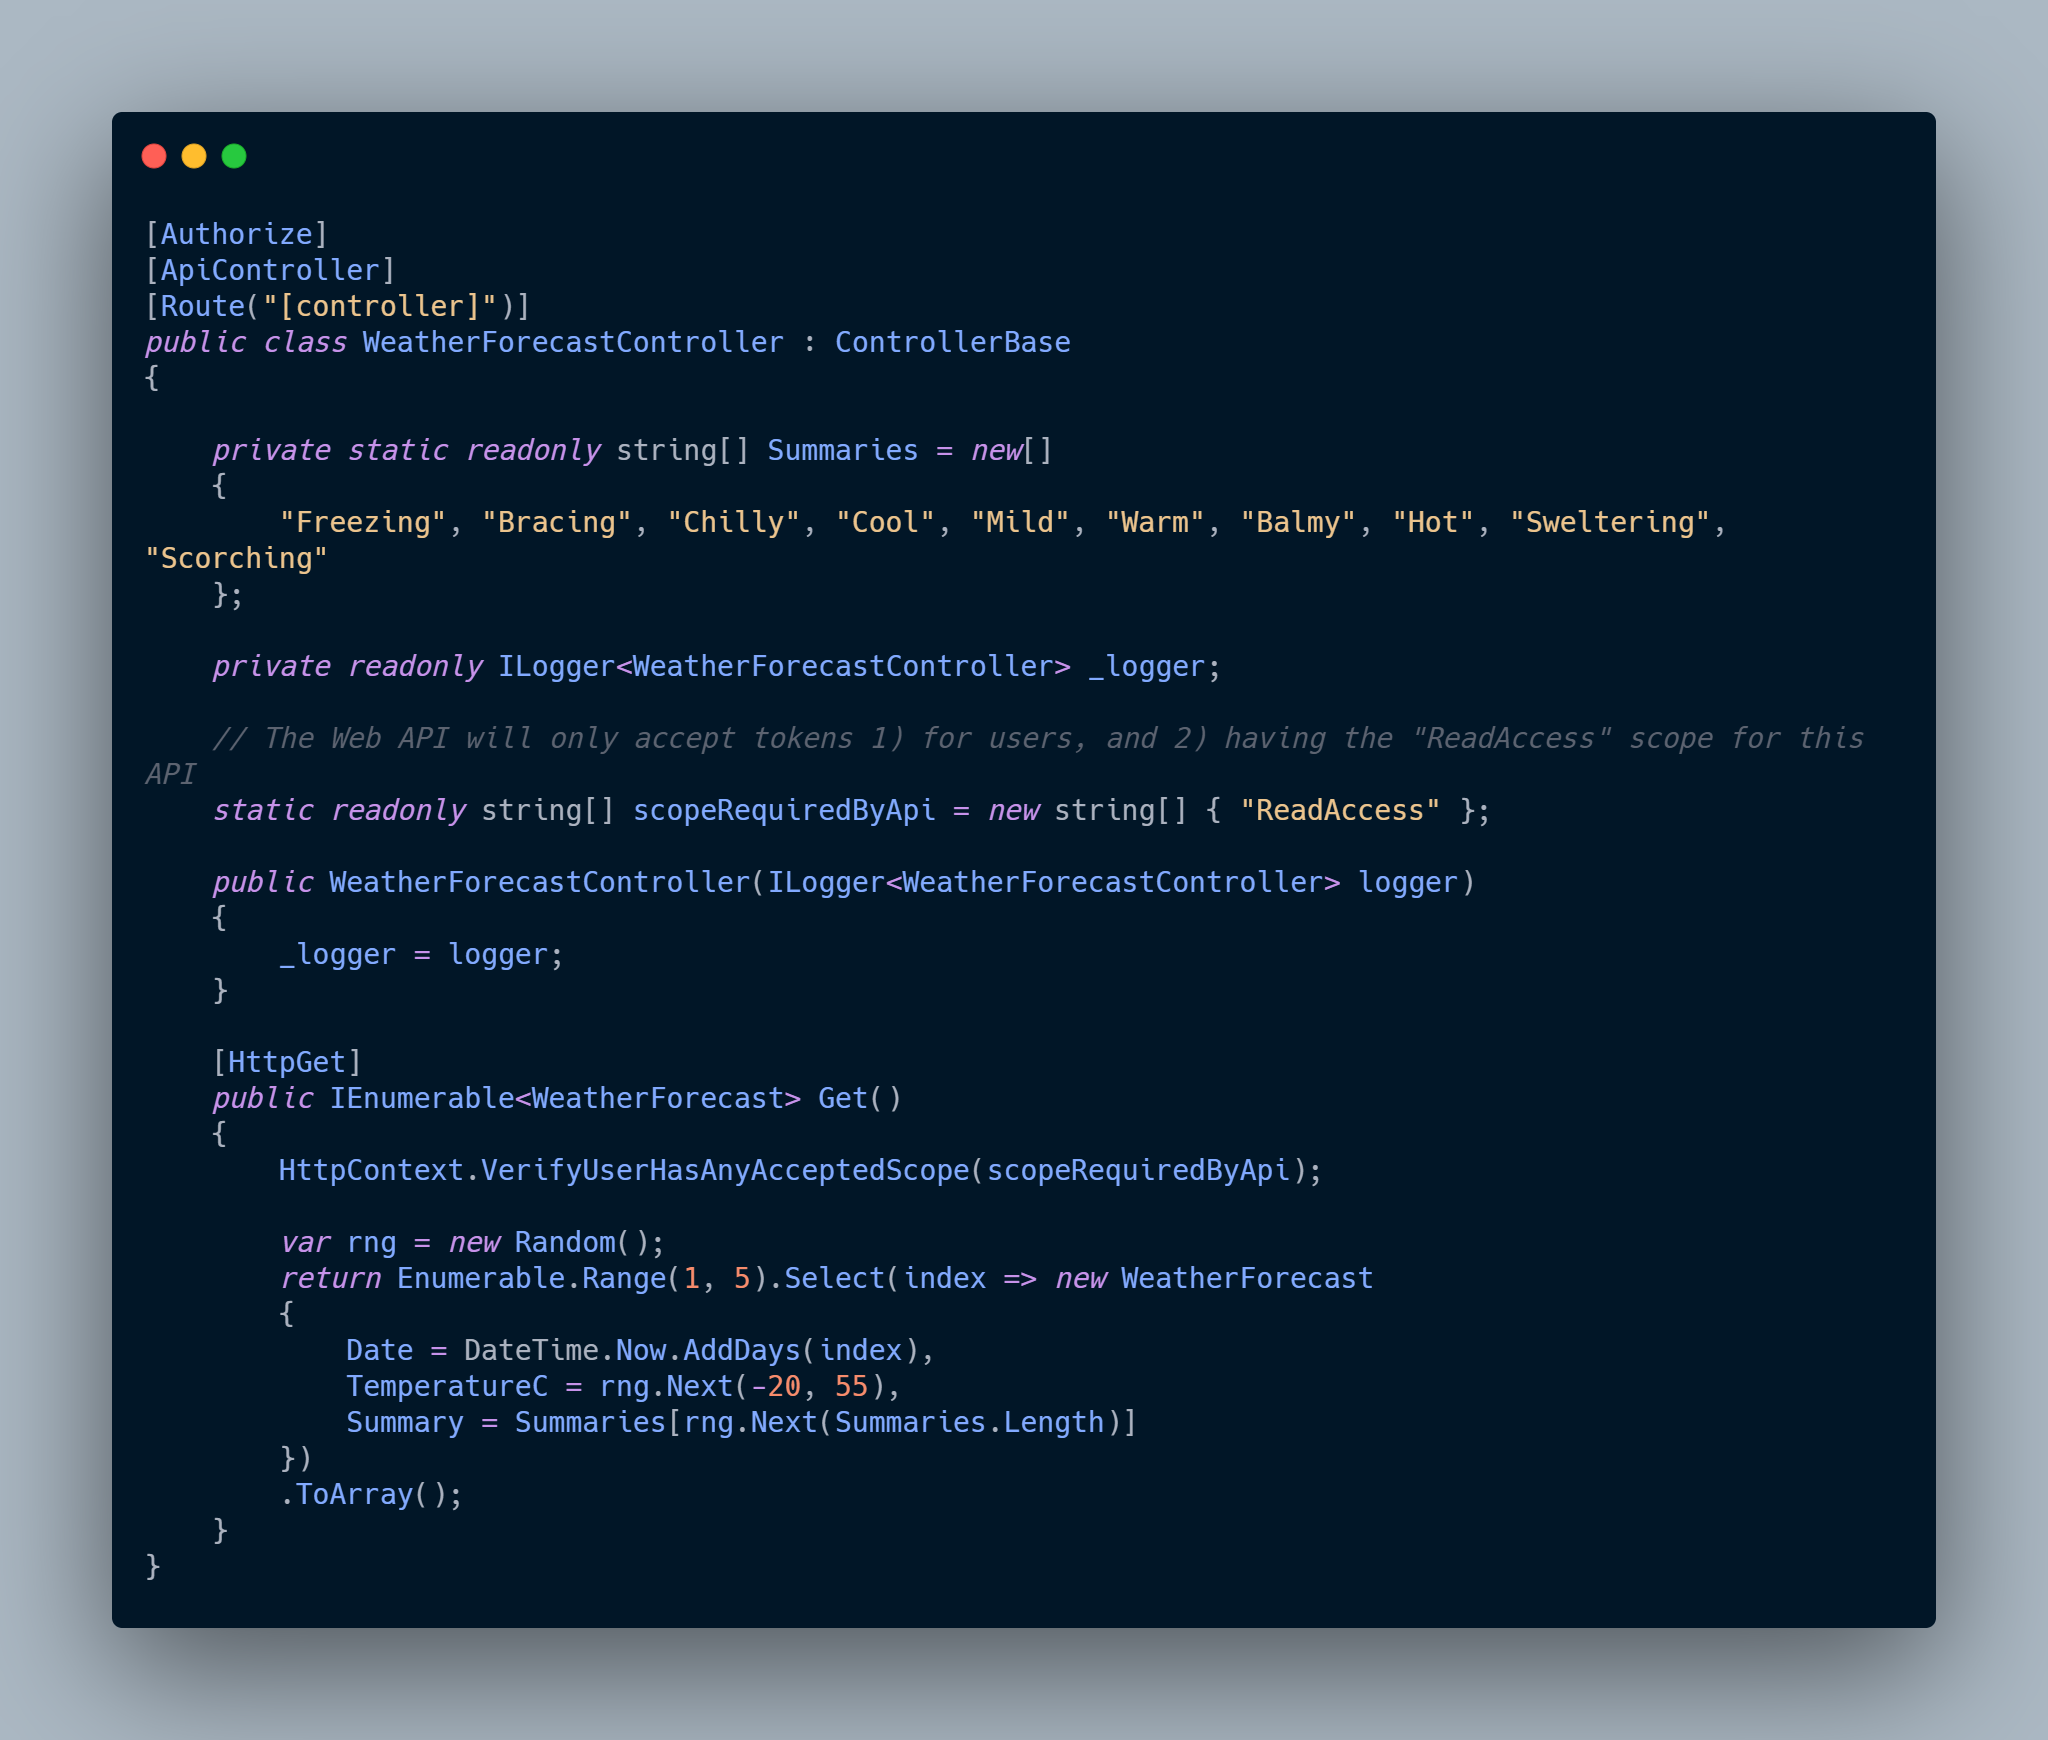
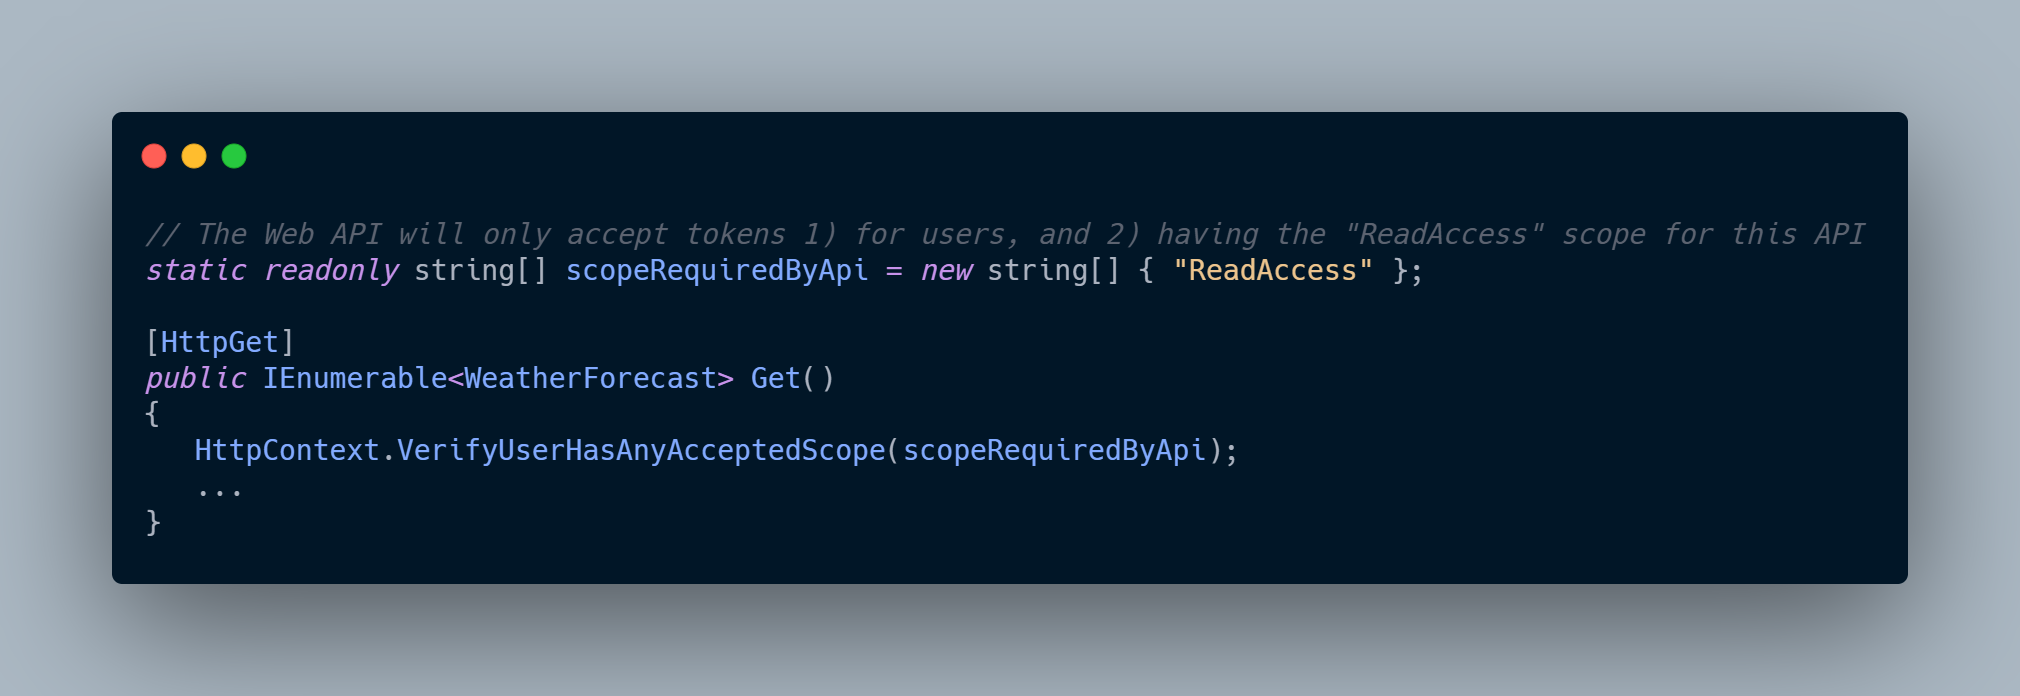
We will adjust our code to accept only accept tokens 1) for users, and 2) having the “ReadAccess” scope for this API.
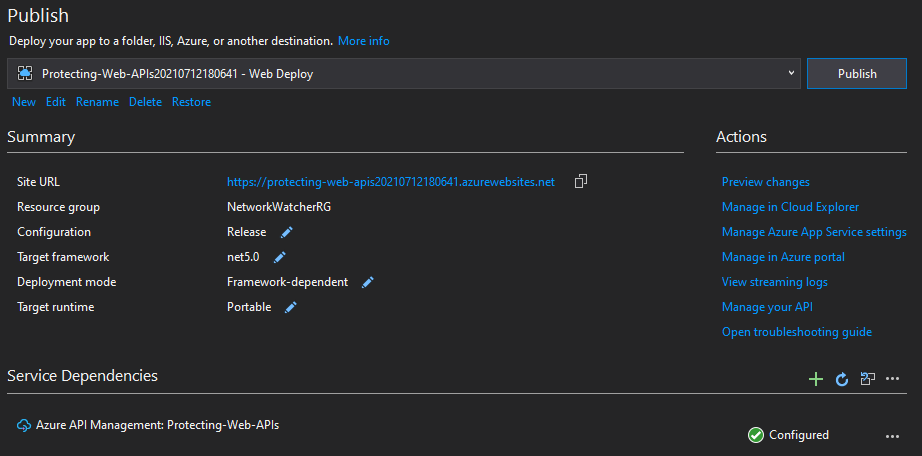
After this point, we can create and publish the application on the Azure App service, e.g., by using Web deploy (right-click on the solution and click Publish). If there is not created App service from this menu you can create it.
Testing the API with Postman
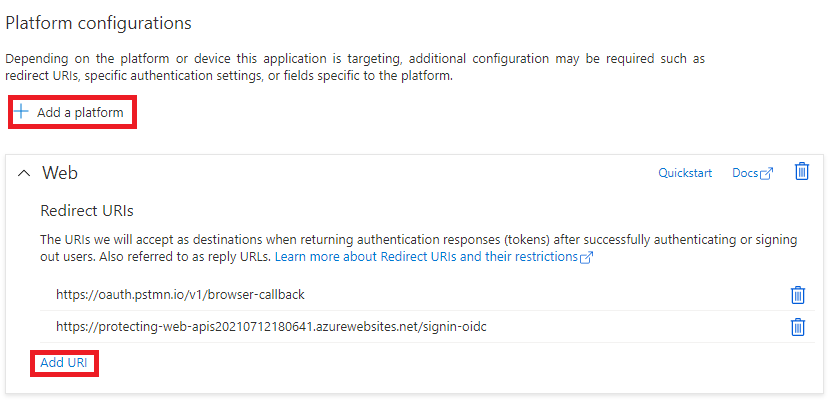
Now when we have deployed our API in Azure, we want to use Postman to test it. The first thing we need to do is to configure Callback URLs. Go to Azure portal to the App registration and click on the Authentication menu, under the Platform Configurations, add the platform (Web) and the Redirect URLs - add the postman call back URL’s - https://app.getpostman.com/oauth2/callback for Postman desktop or https://oauth.pstmn.io/v1/browser-callback for Postman Web app and application callback URL.
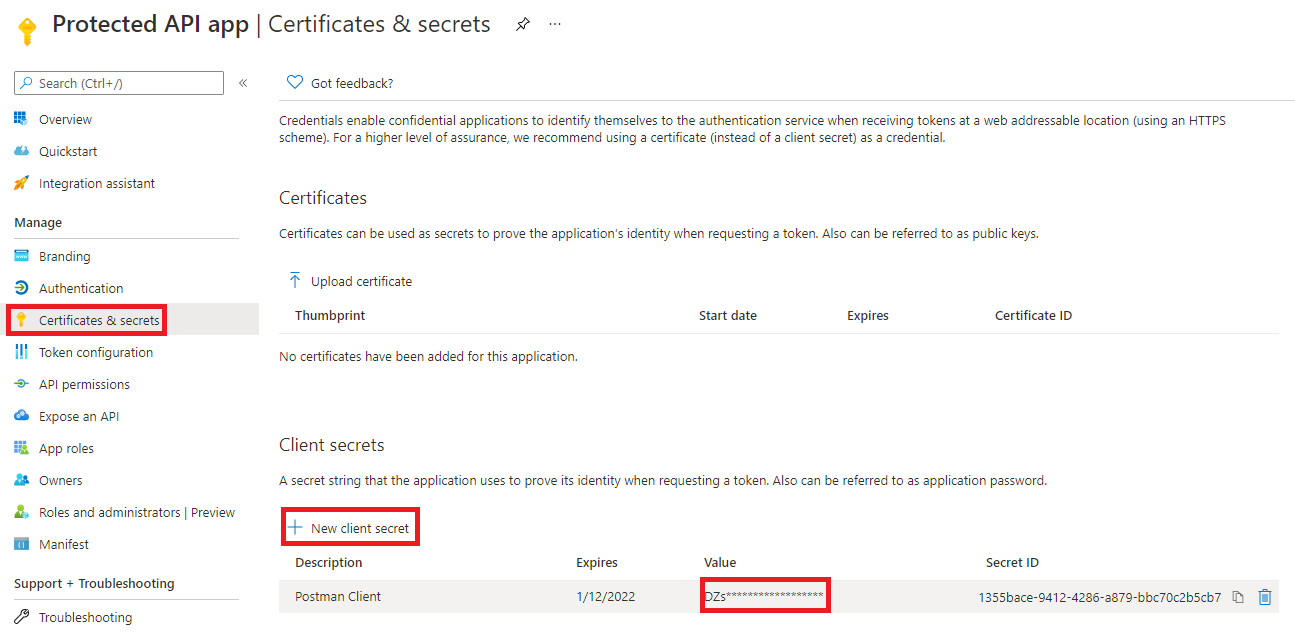
When we created redirect URIs we need to create a client secret too. This is done in the Certificates & secrets menu and then New client secret. Set the description and duration as never. Add click on create it will create a token. Copy it as you won’t see it again.
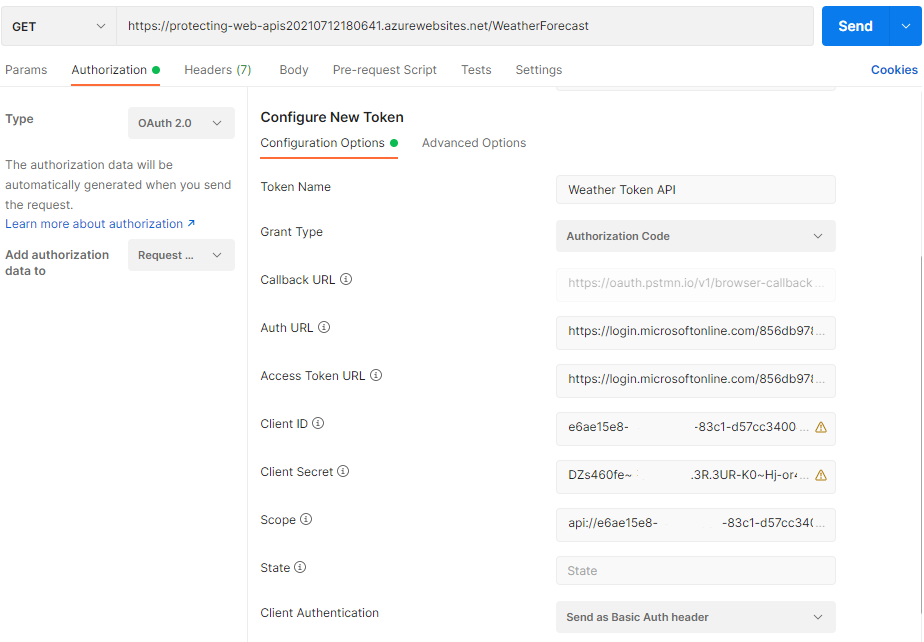
In the final step, we can go to the Postman, create a new GET request to our deployed API (https://name-of-your-app-service.azurewebsites.net/WeatherForecast).
In the Authorization tab, we need to choose OAuth 2 from the Type list and choose Request Headers in Add authorization data to the Values for Authorization in Postman.
- Token name - Valid name.
- Grant Type - Choose Authorization Type.
- Callback URL - https://app.getpostman.com/oauth2/callback.
- Auth URL - https://login.microsoftonline.com/*Tenant ID*/oauth2/v2.0/authorize.
- Access Token URL - https://login.microsoftonline.com/*Tenant ID*/oauth2/v2.0/token.
- Client ID - Client ID > Azure portal.
- Client Secret - Secret Value > Azure portal.
- Scope - Expose API > Scope > Azure portal (e.g., api://e6ae15e8-f337-4138-a25b-d57cc340043e/ReadAccess we created earlier).
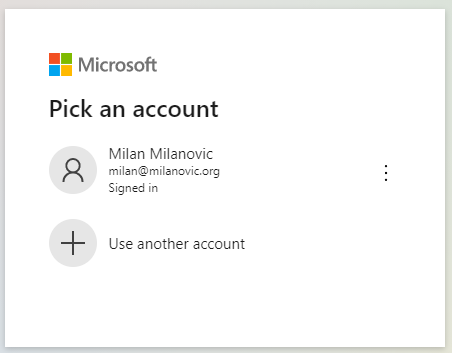
Once you fill up all the fields you can skip the State field, click on the Get New Access Token button. It will popup the Azure AD login dialog and you can log in. Once the login is completed, Postman will show a Token, which can be used to talk to the API.
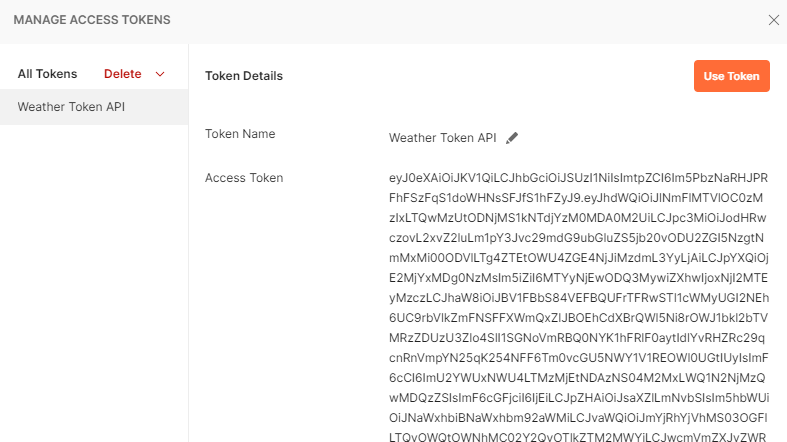
Below is the token generated by authenticating with our credentials click on > Use Token > it will automatically add in the request header.
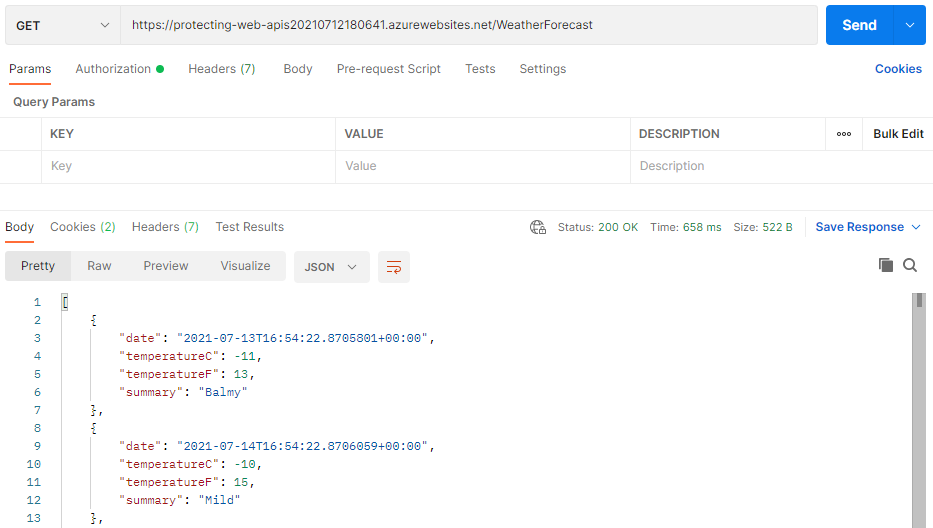
After the successful Authentication, now we can send the GET request which will return the JSON result, like this.
Troubleshooting
401 Forbidden
If you get a error_description with it like Bearer error="invalid_token", error_description="The audience '*some guid*' is invalid". This means you have the wrong client id in your appsettings.json. If you don’t get an error_description with it, that generally means something is wrong with the application registration. Go over the steps above.
500 Internal Error
You should get an error message with this. The most likely cause is that the name of the scope you have in the C# code does not exist in the token.
Adjusting existing ASP.NET Web API
In this example, we started already with the solution that uses Microsoft Identity Web for authentication, which we adjusted. If you have an existing ASP.NET Core Web API which you need to adjust, you need to make the following steps (if you don’t need to do it, just skip this section):
Install NuGET package Microsoft.Identity.Web:
Install-Package Microsoft.Identity.Web -Version 1.14.0
In your appsettings.json you will need to add the AzureAd section:
In the Startup.cs, we need to enable the Microsoft Identity Platform. In the ConfigureServices method, add as one of the first lines in the method.
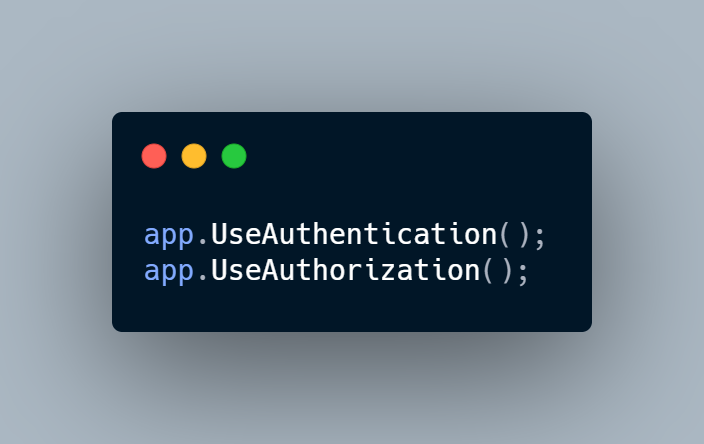
In the Configure() method we need to have:
Also, we need to decorate our controller with [Authorize] attribute.
Finally, we need to add the following code to any methods that we want to check permissions for. In the case you do not provide other scopes or don’t add this scope to any other methods, they will no longer be accessible.
Storing secrets in .NET applications
When we have protected our API, to have our application bulletproof in terms of security for modern software development lifecycle, we need to manage secrets and credentials used to secure communication between different components. Storing secrets in places like a configuration file can expose our application to vulnerabilities similar to the ones due to bad programming practices or bugs. This could be a big challenge for a developer. Whether it’s a database password or a connection string for some service. However, Microsoft Azure offers us a specific kind of service for this type, called Azure Key Vault. It is a Cloud service for securely storing and accessing secrets.
Here we will discuss how to set up Azure Key Vault, store some secret inside and read it from .NET app by using Azure Managed identity. Managed identity is a solution in the Cloud that eliminates the need for developers to manage credentials. Managed identities provide an identity for applications to use when connecting to resources that support Azure Active Directory (Azure AD) authentication. Applications may use the managed identity to obtain Azure AD tokens.
There are two types of managed identities:
- System-assigned, which is enabled for us directly on the Azure Cloud instance.
- User-assigned identity, which is a standalone Azure resource that can be created independently from concrete service instance.
Enable the Azure Managed identity
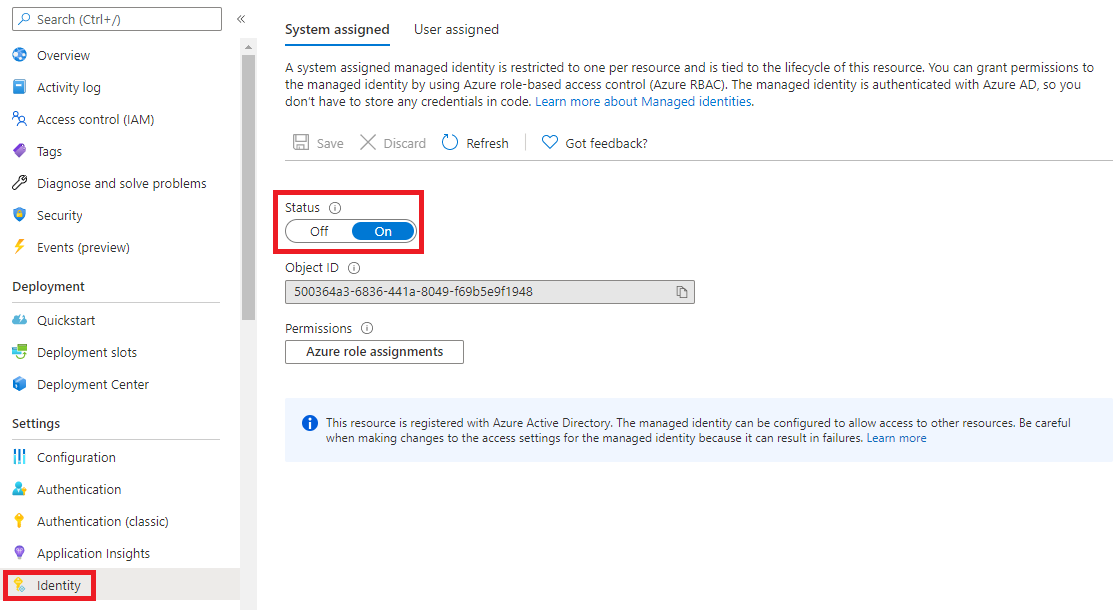
The first step we need to do is to enable system-assigned Azure managed identity for our application or API. From the App service settings menu (left side) we choose Identity and switch the Status toggle to be On. Here we should see the Object ID value displayed.
Create the Azure Key Vault instance
Now we need to create an instance of Azure Key Vault. We do this in the Azure portal by following these steps. When we have created Key Vault we will add a secret inside. From the left menu of the Key Vault configuration page, we select Secrets from the Settings section. Then, we click the Generate/Import button. For the Upload options, we select Manual. For the Name, we can choose Some-app-secret. For the Value, we can enter e.g, “Our secret code” and click Create button.

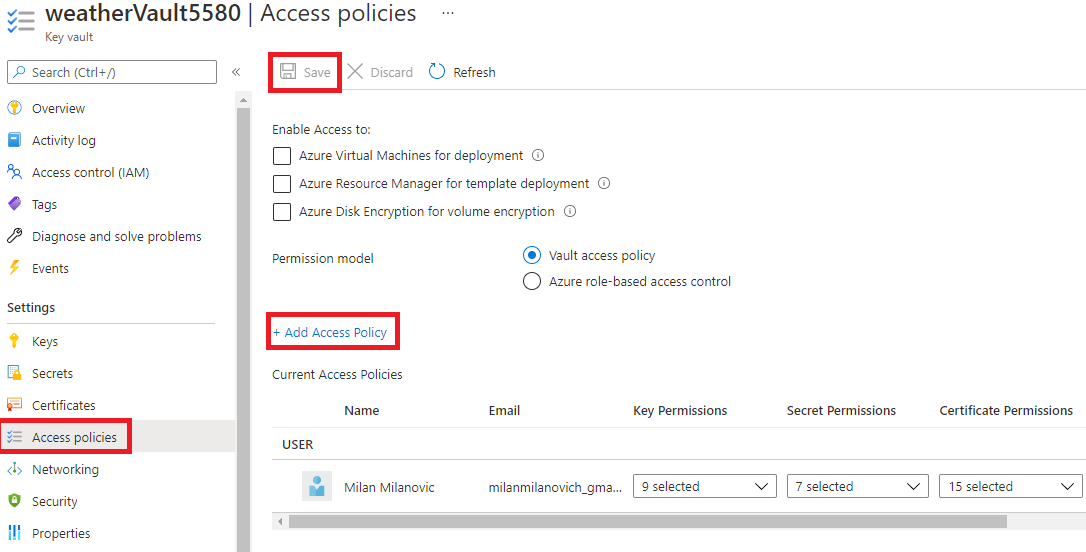
Granting access to the secret
To access this secret from our application we need to grant access to it. From the left menu of the Key Vault page, we select Access policies, and then we click + Add Access Policy. From the Secrets permissions, we can choose List and Get, which will allow us to list and read secret values stored in the Azure Key Vault. Then, we click the Select principal link. In the search box, we have to provide the value of Object ID for the system-assigned managed identity we created above for our Azure Web API instance. We have to select it from the list and click the Select button. Finally, we click Add and Save buttons.
Storing secrets locally
If we want to store secrets locally, we can use the Secret Manager. The Secret Manager tool stores sensitive data during the local development of an ASP.NET Core project, but it hides implementation details, such as where and how the values are stored. How we can use the Secret Manager, you can read here.
We can enable it by adding:
dotnet user-secrets init
or from Visual Studio, right-click the project in Solution Explorer, and select Manage User Secrets from the context menu.
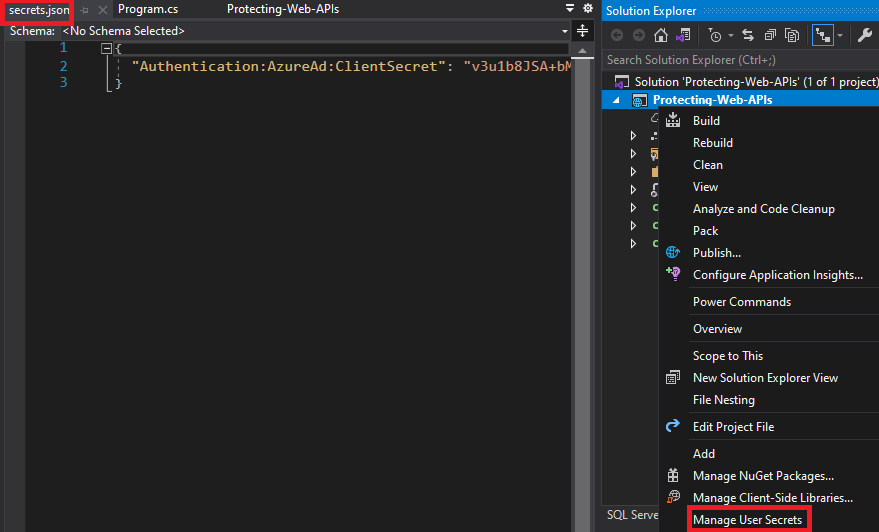
Here we can add or remove secrets in the form of key-values pairs to be stored.
Prepare the application to read secrets
To read secrets from Azure Key Vault in our Web API, we need to add some NuGet packages. With these packages, we can use managed identities to access Key Vault secrets from ASP.NET Core Web API application.
Microsoft.Extensions.Azure — we use this package to inject dependencies for using different Azure SDK clients for accessing Azure services.
Azure.Security.KeyVault.Secrets — this package is used used to select
SecretClientinstances to access secrets stored in the Azure Key Vault.
To authenticate with managed identities, we will use the class DefaultAzureCredential.
Accessing secrets stored locally and in the Cloud
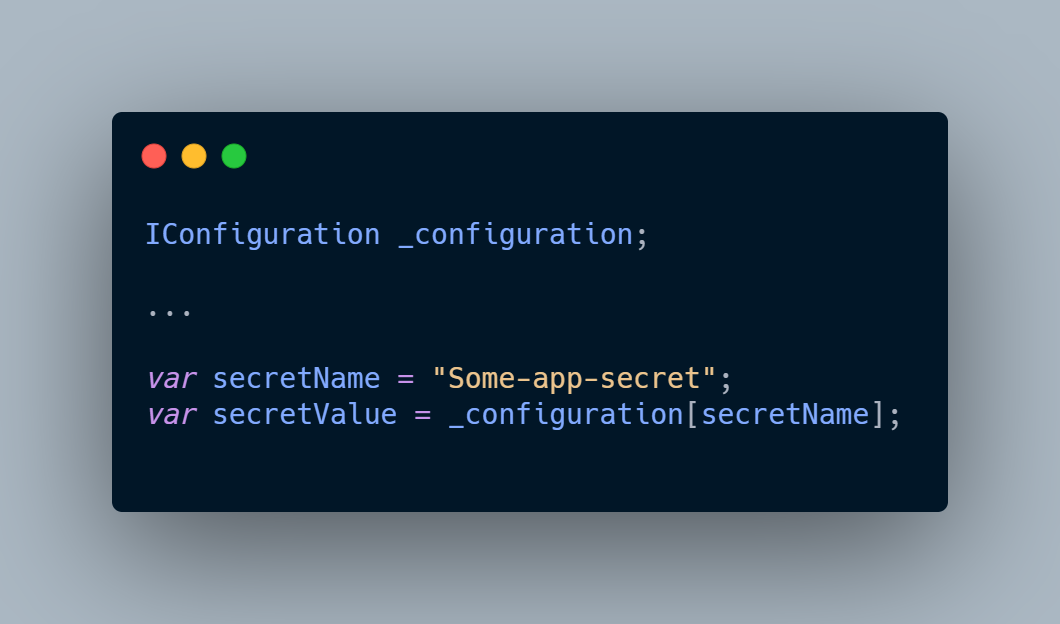
Now, if we want to read our secret from local storage we can do the following, e.g., in Startup.cs:
On the other side, if we want to read the same secret value from our Key Vault store in Azure we setup, we can use the SecretClient class instance, e.g.:
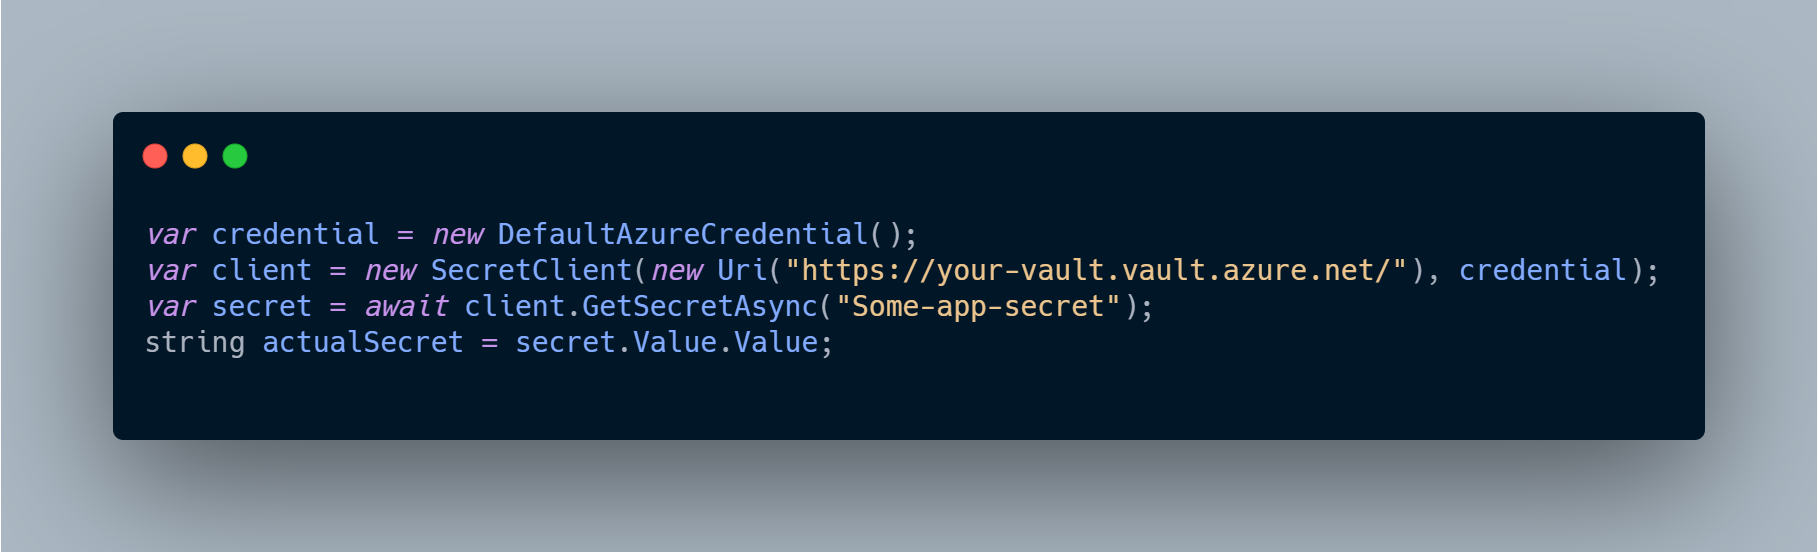
Uri for your Key Vault you can copy from the Overview screen of previously created Azure Key Vault in the step Create the Azure Key Vault instance.
Wrap up
In this article, we have seen how to use different aspects of the Microsoft Identity Platform to protect our Web APIs, but also how to use it to eliminate the requirement to store secrets in application configuration files. By using it, we can directly access different resources without using connection strings and passwords and significantly improve the security aspects of our application.